This Roblox tutorial series is designed to give you the skills you need to navigate the exciting world of game development and to create your very own Roblox games.
The course assumes no prior experience and will take you from a beginner level to an advanced scripter.
You will learn the fundamentals of software development, the Lua programming language, and how to use the Roblox API to bring your ideas to life.
We kick things off with an introduction to Roblox Studio and finding your way around. In the next section, you create your very first script as we introduce the basics of Lua.
Then we integrate Roblox into the mix and delve further into the fundamentals of Lua to build your understanding of programming and game development concepts.
We take the next few sections learning how to implement some commonly used components such as user input and data storage. You will also learn how to apply important techniques to your game.
The Object Oriented Programming section will teach you about one of the most popular ways of conceptualizing and approaching a software design. This section will also conclude part 1 for this tutorial series.
Part 2 is not a linear series of tutorials but instead a collection of standalone sections and guides on design, implementation, and other topics that were not covered as part of the fundamentals.
If you haven’t already done so, head on over to Roblox.com and create an account.
After you have created your account, click on the ‘Create’ in the ‘Home’ screen to open the Creator Hub. And then click ‘Create Experience.’
This will download the installer for Roblox Studio. Once the download is complete, click on the downloaded file to install Studio. Roblox Studio is generally not computationally demanding so any Mac or Windows PC built in the last five years should be able to run the program.
After the installation, you can launch Studio directly from your computer or from your browser through the Creator Hub
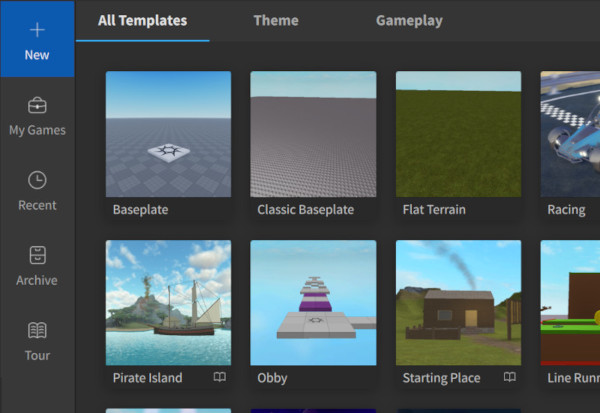
Games are built atop one of various pre-made “templates.” These templates can be found under the ‘New’ tab from the Studio home screen.

Most of the templates include a lot of extras that are unnecessary and can be overwhelming for beginners. As your knowledge advances, you can return to these other templates to see how they work and expand upon them.
But aside from prepopulated assets, there is no inherent difference from the ‘Baseplate’ template so that will be our starting point. Click on the Baseplate template to get started.
After the template has been created, Studio will bring up the main development environment. The busy interface of buttons and windows might look intimidating, but there are only a handful that we are interested in right now.
Let’s familiarize ourselves with the interface.
